hi everyone, I’m an angel and I’m new to this world!
I have found a problem to which I have not found a solution.
I have trussed sprites, only the program sees them as if they were squares. even using the crop function, it does not eliminate all transparent pixels … how can I solve? thank you very much!
Hi!
It seems like you need to remove the square background using a photo editor, and Windows’ MS Paint cannot do so.
Piskel, the GDevelop 5 image editor, can do it - just use something called Magic Wand tool.
As an example:
Here is a sprite with white background.
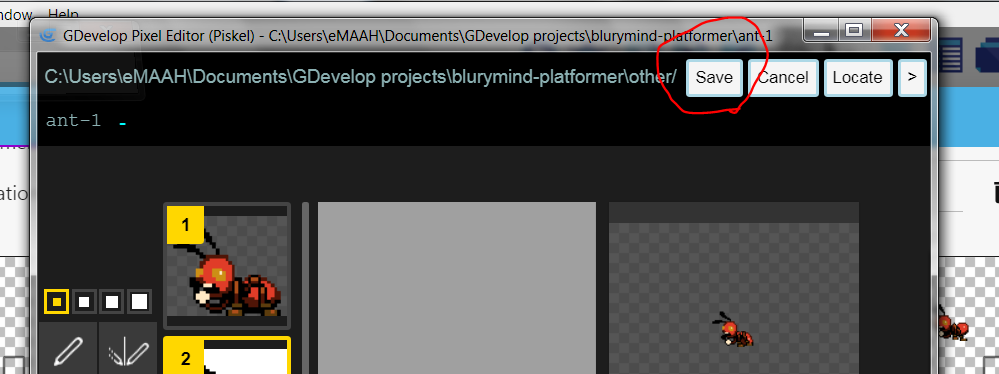
Select the tool marked with red:
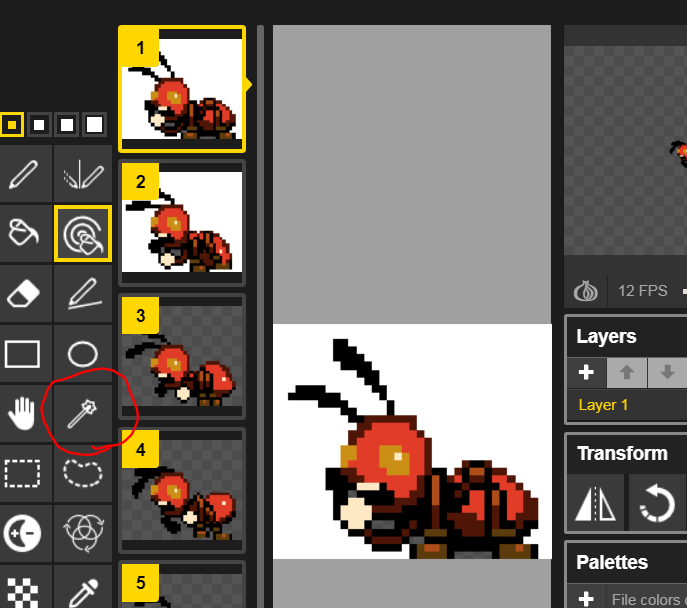
Then, click on the white area, it will turn blue.
Press Delete. The white background should be similiar-looking to the grey checker, meaning it’s transparent.
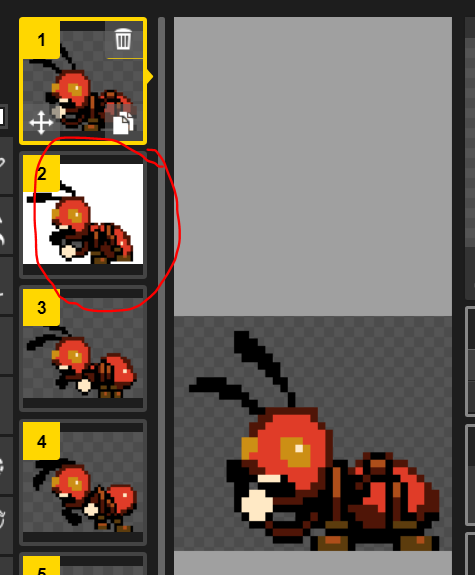
Repeat this for other frames of the sprite.
Finally, click Save at the top!
Hopefully that answers your question.
(This sprite taken from Dialogue Tree example. Credits to blurymind I guess?)
2 Likes
First of all thank you for the answer!
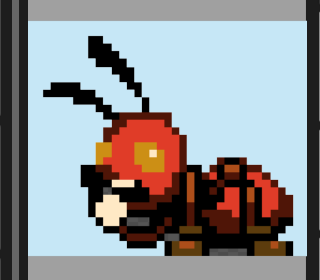
but, no, that’s not my problem. I created a camera, with a yellow range, only that the character even if it doesn’t touch that camera is eliminated, because the camera sprite is a square. attach photos to show the problem

I want to eliminate that useless space, as the character collides before touching the camera… and it’s not really a nice effect ![]()
oh, i see now.Thank you for screenshot, it really helps
For this there are two methods:
- Create collision mask/hitbox (recommended)
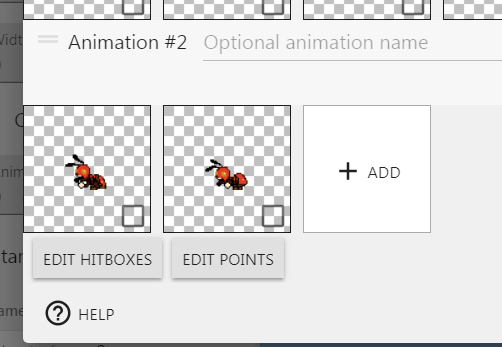
For this one, go to your camera sprite, click Edit Hitboxes in the bottom left (picture). Then, click “Use custom collision mask”
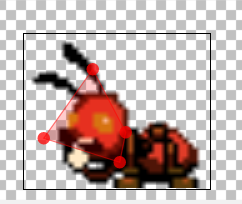
Then, notice the red dot in top left. Zoom in (ctrl + mouse wheel), and start dragging them one by one to be the shape that you want, in your case you can drag the 4 points to be a triangle.
In my example the result looks like this:
Repeat it for other animation/frame as needed (maybe longer/shorter camera cone?).
Then, close that, make sure to hit Apply! It should work now.

1 Like
Yes! It works perfectly, I had just ignored this option! Thank you very much!!
whether or not you mean to allow the passage under the chamber, no, the robot can pass under the chamber
one last question, the camera triangle, is there a way, via piskel (or other software, like gimp) to lighten it? in the sense of making it semi-transparent, so that the soil can also be glimpsed
1 Like
I haven’t used Piskel much, but it doesn’t seem to allow semi-transparent color. You will need other software (gimp, if you know how to - personally I use paintdotnet) .
Alternatively, you can serparate the camera triangle into two objects, move center image point to the small part… but that’s a lot more work.
1 Like
thank you for your suggestion!
1 Like
Hi,
You cannot change the opacity inside Piskel, but you can change the opacity of anything inside GDevelop. ![]()
Use the opacity actions for that.
2 Likes
Good evening, and I’m sorry if I have another collision mask problem… I did the procedure, and for static images it works perfectly. but now I’ve tried to use it for mobile images, (always the camera, but this time it moves, I animated it with dragonbones(I’m pretty good with that program, much more than with gdevelop :D), and created 40 images) and when I go to save the change to the hitboxes saves for only one of 40 frames… Recommendations? wrong something myself, or is it a bug?
Thank you for the tip! I’ve seen it a little bit, but, in my opinion, for my problem, it’s easier to create it directly transparent through Gimp or other program… I found it much simpler and more immediate!
Perhaps, it is better in case the sprite should not always be transparent (?)
It’s okay, but what exactly is the animation you did? Does the camera rotate with that 40 frames or does it just do an animation without moving? (camera changing colour?)
If the camera rotate, I assume it’s not saving for the 40 frames because you’d need to do it manually for each frame it rotates slightly differently. If the animation is static you can use a checkbox that makes the collision mask the same for each 40 frames of the “animation”. Otherwise…
You will need to use image point - set the default center point to the “base” of the camera or the triangle and use rotation events to rotate it, so the hitbox/collision mask will be rotated also.
Then… make object variable that can be “left” or right", determines the direction it’s rotating, make two events to rotate it depending on the object variable is “left” or “right”, then make another two conditions to change the direction when it needed.
1 Like
Hello, excuse the delay!
the animation rotates, going up first, and going down, I cycled it specifically to simplify the work…
I thought about the same problem myself, but even changing a frame and saving it, as soon as I try to change the second frame creates the same problem again…
Hi again - the collision mask probably reset because of this option enabled:
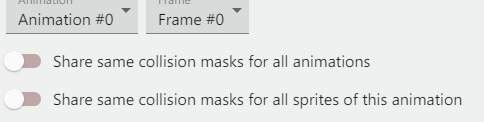
If you edited the frame, it would still be the same for other frames. Make sure to also do this for the player character?
Still, I would recommend rotating it using GDevelop events, so that when you want to place camera at different positions you can make them go 45 degree at a corner or 160 degrees for a flat wall.
If those pictures aren’t informative enough, just scroll down and explore the example project I linked there. Mess around, and see if it explains something you did not understand.
Anyway…
Here’s the part where center image point is moved on the camera sprite - to access it just go to Edit Sprite > Edit Points. We’d want to put it on the “base” of the camera.
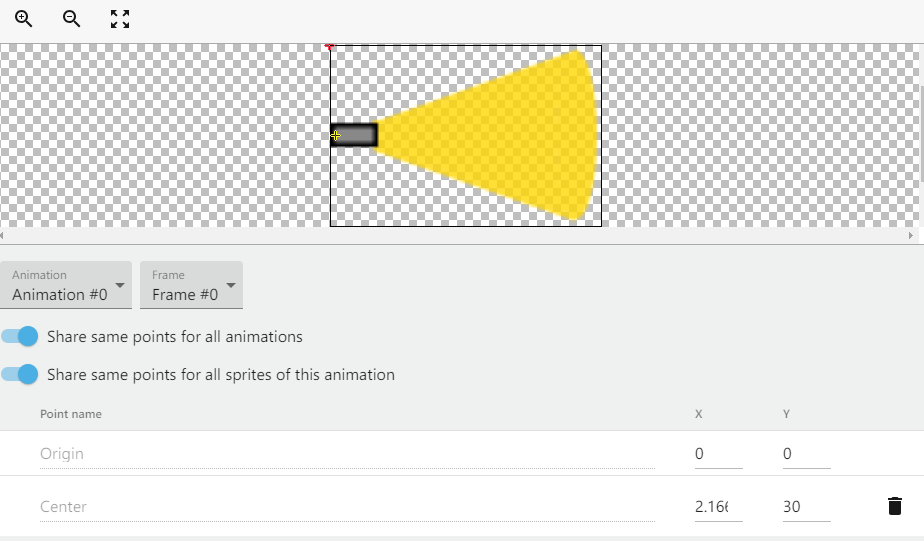
To do that, we’ll use Image Points to center the camera to its “base”, then rotate it using object variables (to tell how much it should rotate).
So, when the game starts, we’ll do this:
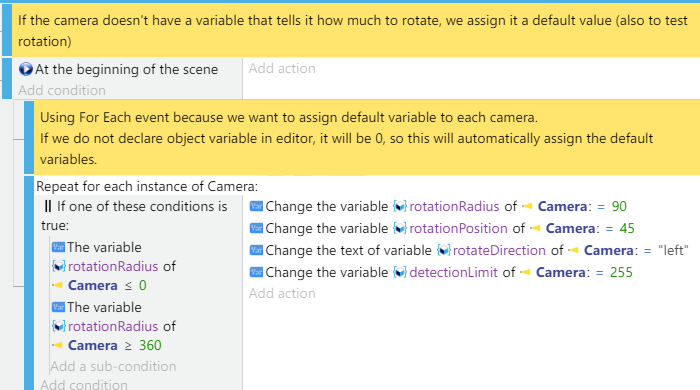
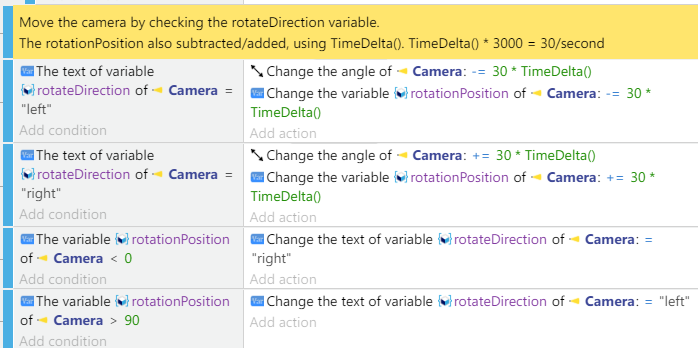
Then, with those variables, we make the camera rotate back and forth:
And then, when the camera detects the player (player collides), do something. In this picture I simply teleport the player. You’d want to insert your own events here.

Well, wow, that’s complex actually, even to make the mechanics took me some time.
Here’s a google drive link of the project, you can open it in your GDevelop 5. Hope it helps.
https://drive.google.com/open?id=19EVNgvNkTLIXlHh_U-UHL3-KHqdderUK
1 Like
Great, Thank you very much, this method works, and made my little game even much lighter! It’s also easier to animate! Thank you for the tip!
If I know, how long have you been using Gdevelop? you’re really very good!
1 Like
Not counting breaks, about 6 months (I first used it in 2018, for university). Thanks for the compliment! There are others that are even better, like gruk up there, arthuro555, and silver-streak, but the discord gets faster replies than the forum.
Generally, thanks for the question since it makes me upgrade my knowledge! And remember to keep a healthy balance between trying to solve things by yourself through research or trying with the program, and asking for help.
Most of my learning was looking through the conditions, actions, and looking in the documentation what they mean, but that gets really long sometimes, so yes asking for help is good too!
Another thing I will say is, have fun making your game ![]() That’s the most important part of the journey.
That’s the most important part of the journey.
1 Like
Thank you so much for your really valuable advice!
I’m doing as rightly recommended by you, but I’m having several problems that sometimes I do not find in the documentation, for example if and else, I do not understand how to simulate it (for a button for audio)