I thought, id make a little Tutorial on how to optimize Images using gimp.
Gimp has the advantage that you can do all optimizations in 1 program, and you can do it offline.
You need:
GIMP
Layers export plugin
Step1:
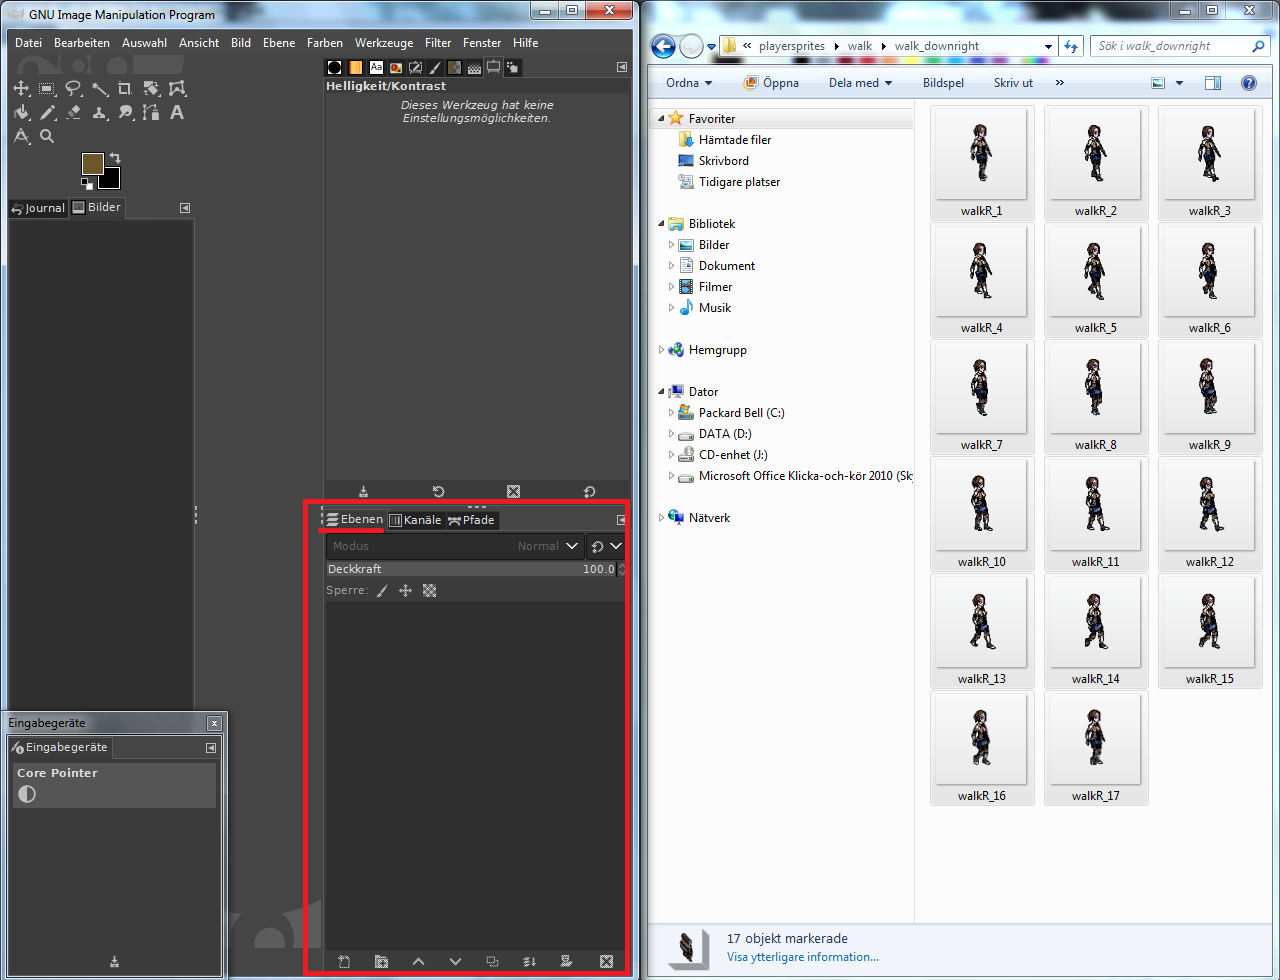
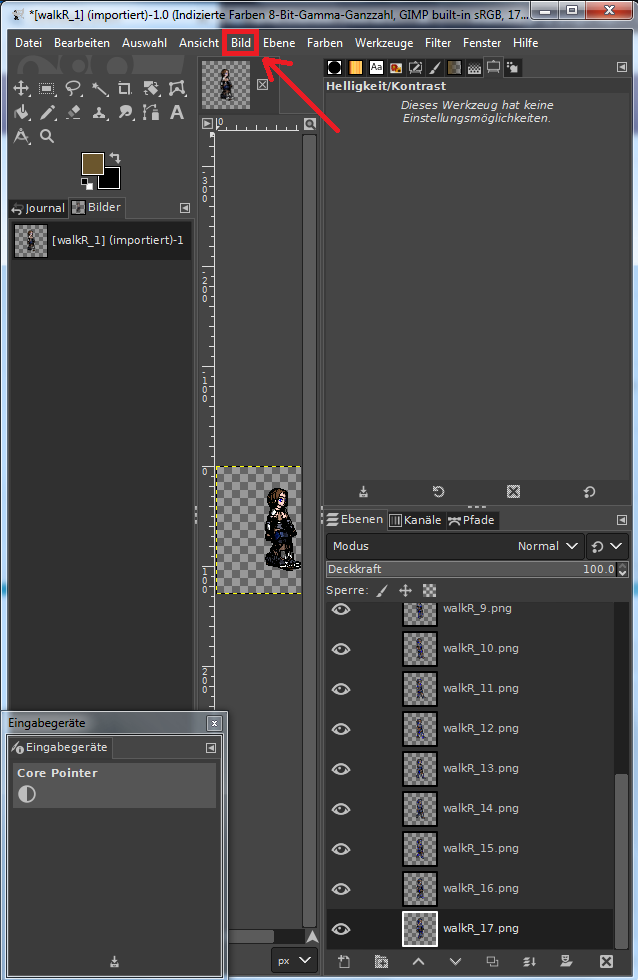
setup the windows, i like to have gimp on the left, and the folder with the to be optimized images on the right.
Important is to have the Layer window open and visible (marked in red)
Step2:
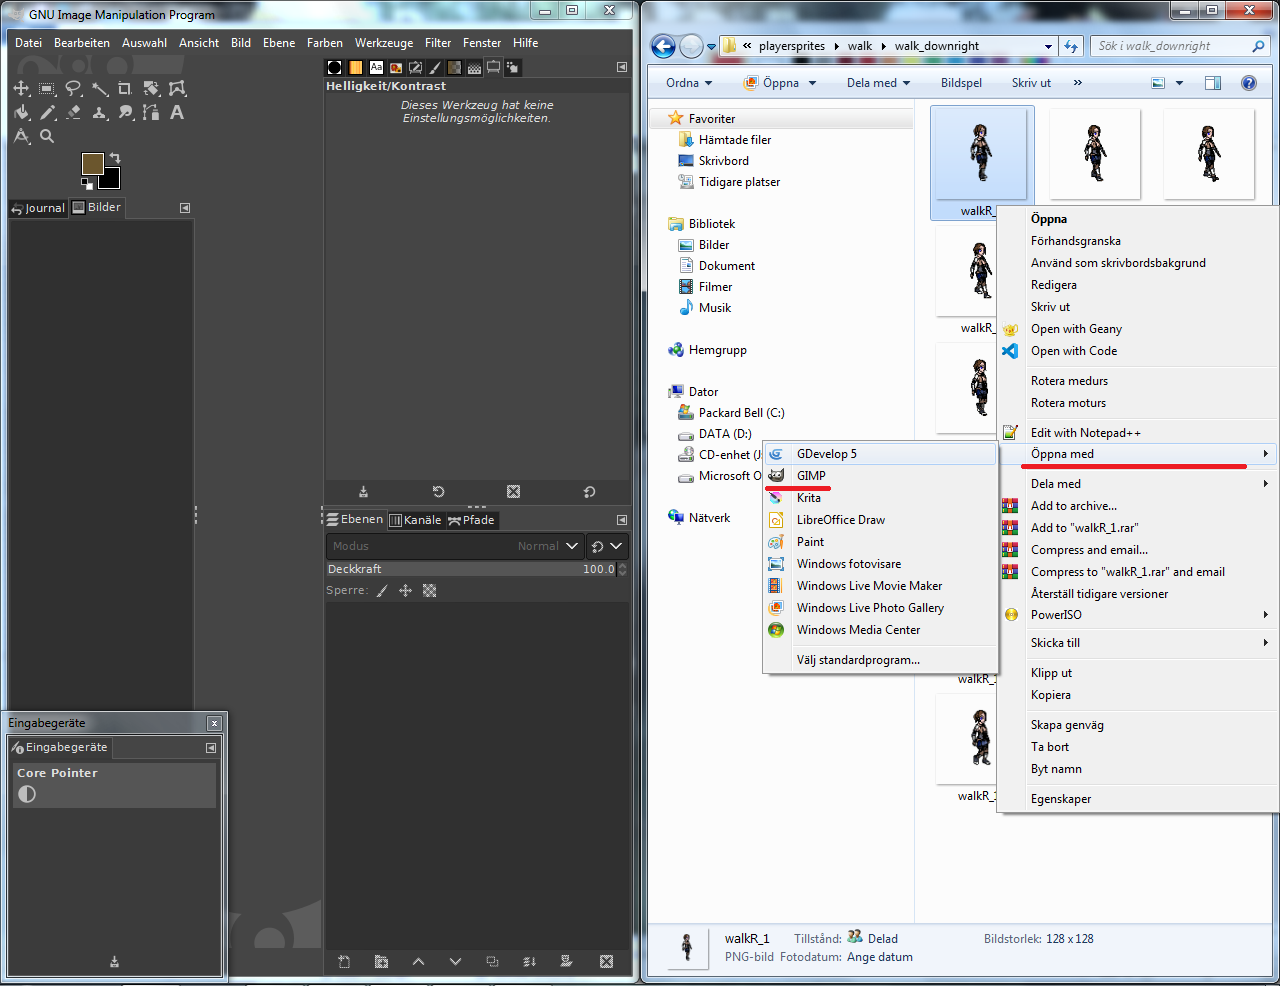
Open the First image. I like to right click the image and click open with … and choose gimp. 1 image needs to be opend to set up the canvas size and activate the layers.
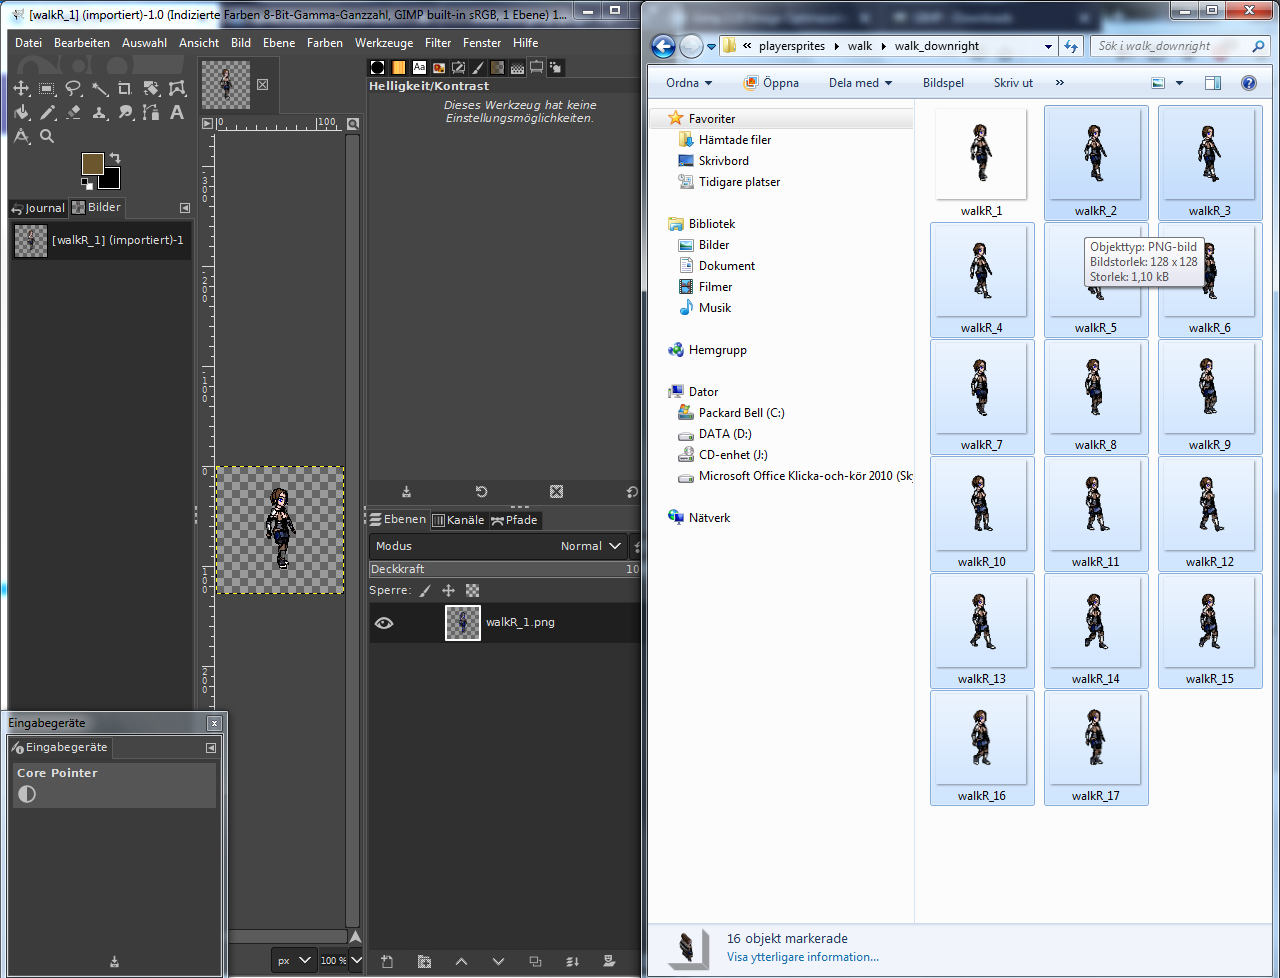
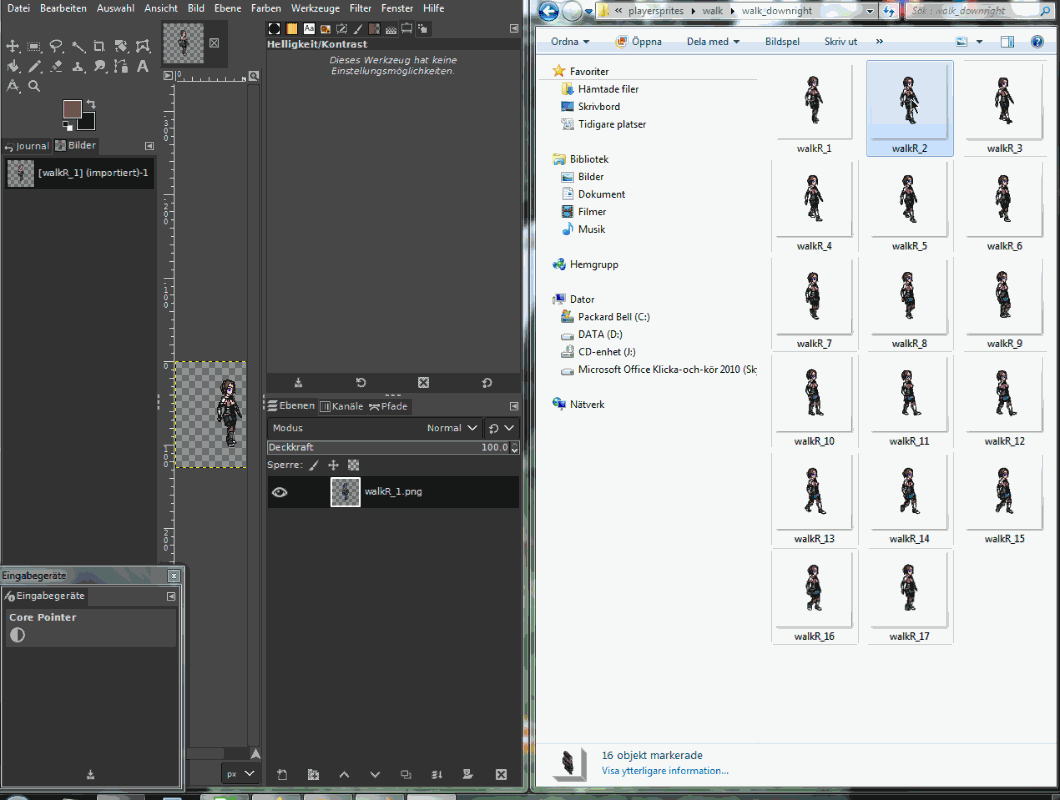
Step3: Select your other images.
Step4:
Hover over the second image, hold the mouse down and drag the images inside the gimp layer window, under your first image.
Now that your images are imported as layers to gimp, its time to reduce the colors, if needed, to decrease the file size.
Step 5:
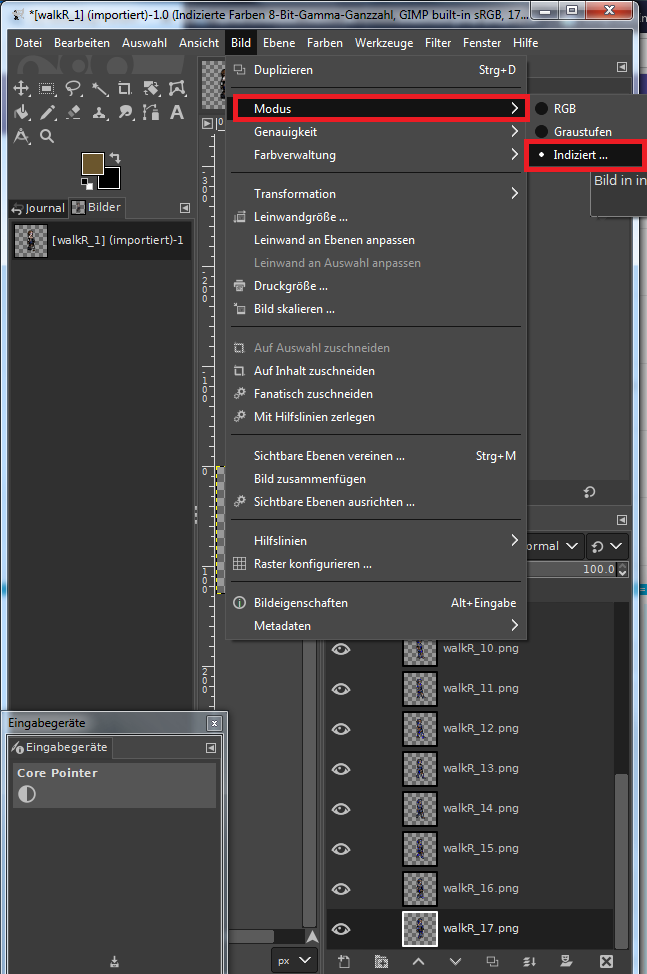
Click on the Image tab:
then on mode → indexed
A window will open, where you can write the number of colors you desire.
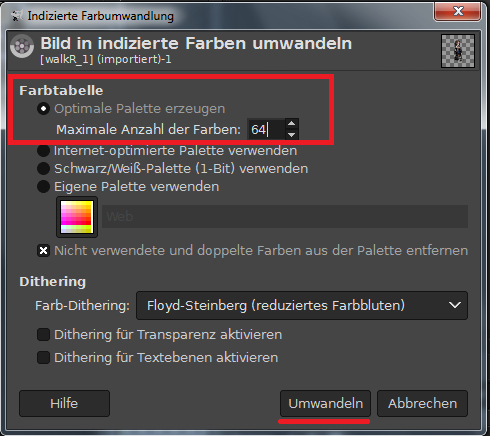
There are some options on how the dithering will be done.
for more info visit:
https://docs.gimp.org/2.10/en/gimp-image-convert-indexed.html
Step6:
After the color reduction, its time to export the layers as images.
Here is where the plugin comes in (thanks to the creator! khalim19 )
Click on file → export Layers (repeat)

The Export layer window will pop up, where you choose the folder where you save the images to.

Click export.
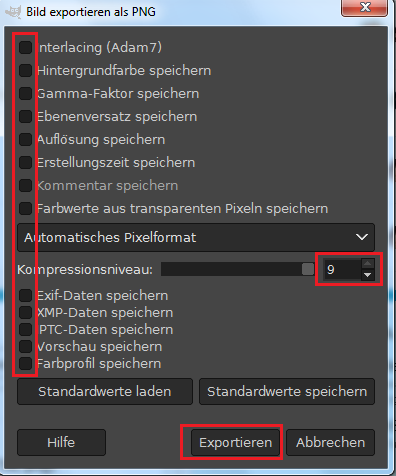
A new window will pop up, where you can choose your export options
remove all crosses from the checkboxes to the left. they save metadatas and make the file size needlessly bigger.
set the compression to maximal (9) and hit export.
And thats it.
Hope this is helpful,
and apologies for using the german version of gimp in the screenshots and the swedish windows system language.